
Satisfy your sweet tooth with these easy-to-make homemade caramel rolls! Perfect for breakfast, dessert, or anytime in between. Try them today and indulge in gooey goodness.
Whenever there are caramel rolls around in our house, they do not last long! It was a cool, rainy fall day today, so I thought these would be the perfect thing to add a little warmth to our home.
To make this recipe simpler, I use my bread machine to make the dough. I love the fact that I can just throw all the dough ingredients in and get other tasks done at the same time. Not only do I love using my bread machine for that reason, but I’ll let you in on a little secret . . . I make a lot of homemade bread, but I really don’t enjoy kneading dough. Our bread machine is used A LOT in our home.
EQUIPMENT NEEDED TO MAKE HOMEMADE CARAMEL ROLLS
- Bread machine (click for one similar to mine)
- Oven
- 9×13″ Baking dish or 12″ cast iron pan
- Pastry brush
- Measuring cups & spoons
- Rolling pin
- Knife
- Spatula
- Cooling rack
- Storage container
INGREDIENTS NEEDED
- 1 batch of dough from my Bread Machine Dinner Roll Recipe
- 2/3 c. + 3/4 c. brown sugar, divided
- 1 1/2 tsp. ground cinnamon
- 1 Tbsp. milk
- 1 Tbsp. honey
HOW TO MAKE DELICIOUS HOMEMADE CARAMEL ROLLS
Prepare dough using my Bread Machine Dinner Roll Recipe. Follow the same directions until dough cycle is complete and dough has doubled in size.
Remove dough pan from bread machine and punch down dough. Turn it out onto a lightly floured surface.
Roll dough into a 10×8″ rectangle (if need be, sprinkle with additional flour to make the dough easy to handle).
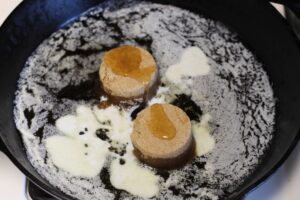
Melt butter (I do this directly in a cast iron pan on the stovetop). If using this option, remove pan from heat as soon as butter is melted to cool off. You do not want to start cooking the caramel rolls. You just want your pan to be warm. It will help the rolls rise quicker.
Lightly brush a tablespoon of butter onto rolled out dough.
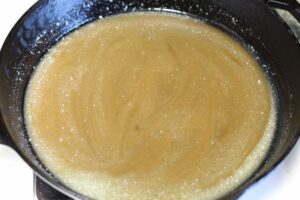
Take remaining melted butter – add in 2/3 c. brown sugar, a tablespoon of milk, and a tablespoon of honey (directly in cast iron pan if using). Stir to combine. (Other option would be to combine these ingredients in dish you melted butter and spread mixture into 9×13 baking dish if you are using that instead).
Combine 3/4 c. brown sugar and cinnamon. Sprinkle mixture evenly over rolled out dough.
Beginning with the longest side of the dough, roll up jelly roll style.
Seal seam. Start by pinching seam together followed by gently rolling the dough back and forth over the seam until it stays together.
Cut into 10, one-inch slices with a sharp knife. Place rolls cut side up into baking dish with bottoms dipped in butter mixture.
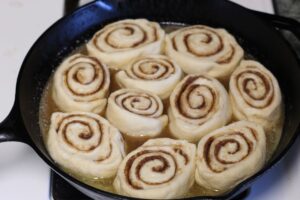
Cover. Let rise until doubled in size.
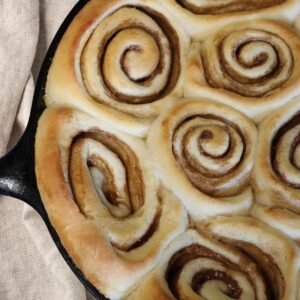
Bake in a 375-degree oven for 18 – 22 minutes until they are golden brown.
Let cool 15 minutes.
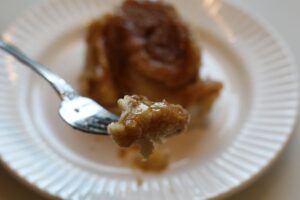
Using a spatula, scoop rolls out of baking dish. Flip them over onto cooling rack so caramel is on top. Let cool completely.
Enjoy!
HOW TO STORE ANY LEFTOVERS (if there are any left) 🙂
Once caramel rolls have completely cooled, store in an air-tight container for up to 3 days.
They taste best when reheated until just warmed.
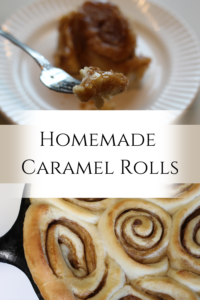
PIN IT FOR LATER!
Delicious Homemade Caramel Rolls
Ingredients
- 1 batch of dough from my Bread Machine Dinner Roll Recipe
- 2/3 c. + 3/4 c. brown sugar divided
- 1 1/2 tsp. ground cinnamon
- 1 Tbsp. milk
- 1 Tbsp. honey
Instructions
- Prepare dough using my Bread Machine Dinner Roll Recipe. Follow the same directions until dough cycle is complete and dough has doubled in size.
- Remove dough pan from bread machine and punch down dough. Turn it out onto a lightly floured surface.
- Roll dough into a 10×8″ rectangle (if need be, sprinkle with additional flour to make the dough easy to handle).
- Melt butter (I do this directly in cast iron pan on stovetop). If using this option, remove pan from heat as soon as butter is melted to cool off. You do not want to start cooking the caramel rolls. You just want your pan to be warm. It will help the rolls rise quicker.
- Lightly brush a tablespoon of butter onto rolled out dough.
- Take remaining melted butter – add in 2/3 c. brown sugar, a tablespoon of milk, and a tablespoon of honey (directly in cast iron pan if using). Stir to combine. (Other option would be to combine these ingredients in dish you melted butter and spread mixture into 9×13 baking dish if you are using that instead).
- Combine 3/4 c. brown sugar and cinnamon. Sprinkle mixture evenly over rolled out dough.
- Beginning with the longest side of the dough, roll up jelly roll style.
- Seal seam. Start by pinching seam together followed by gently rolling the dough back and forth over the seam until it stays together.
- Cut into 10, one-inch slices with a sharp knife. Place rolls cut side up into baking dish with bottoms dipped in butter mixture.
- Cover. Let rise until doubled in size.
- Bake in a 375-degree oven for 18 – 22 minutes until they are golden brown.
- Let cool 15 minutes.
- Using a spatula, scoop rolls out of baking dish. Flip them over onto cooling rack so caramel is on top. Let cool completely.
- Enjoy!
Leave a Reply