
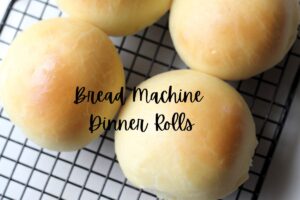
These light and fluffy bread machine dinner rolls are easy to whip up. They take minimal effort to put together but will make everyone believe you were working hard in the kitchen all day! 😉
Once you’ve had homemade dinner rolls, it’s hard to go back to the store-bought brands. These have no preservatives, so will be a much healthier option for your family.
WHAT EQUIPMENT DO YOU NEED?
- Bread machine
- Measuring cups & spoons
- Spatula (optional)
- cookie sheet
- parchment paper
- Saucepan & stove or microwave with glass, microwave-safe dish (to melt butter)
- Oven
- Serrated knife (optional)
- Pastry brush (optional)
- Cooling rack
- Storage container or baggie
WHAT INGREDIENTS ARE NEEDED TO MAKE DINNER ROLLS?
- 1/2 c. Butter
- 1 c. Milk
- 2 Eggs
- 1/4 c. Sugar
- 1/2 tsp. Salt
- 3 1/4 – 3 1/2 c. All-purpose flour
- 1 tbsp. Active dry yeast
CAN THESE BREAD MACHINE DINNER ROLLS BE MADE DAIRY- FREE?
Yes, I often make them dairy free by substituting the butter for avocado oil and the milk for unsweetened almond milk. I do not brush the tops of them with anything. They are just as good!
DOES IT MATTER WHAT ORDER I ADD THE INGREDIENTS TO THE BREAD MACHINE?
Yes. My machine has a manufacturer’s suggested order to add ingredients, so I follow those guidelines (mine suggests adding any wet ingredients first). I would suggest reading your instruction manual to see what suggestions yours has. They no longer sell the bread machine I use, but here is a good option in the same brand if you’re looking for one.
DIRECTIONS FOR MAKING BREAD MACHINE DINNER ROLLS
ADDING INGREDIENTS TO BREAD MACHINE PAN
My bread machine has a bread pan that removes from the bread maker. So first, I take that out and set it on my countertop closest to where my baking ingredients are.
Crack the 2 eggs and add them directly to the pan.
Next, melt the butter on low heat in a saucepan (or microwave if you choose). Once it melts, add the milk into the butter to cool it down right away before adding it into the bread machine pan with the eggs. I do that so the milk cools off the butter and does not scramble the eggs!
From there, add in the salt and sugar.
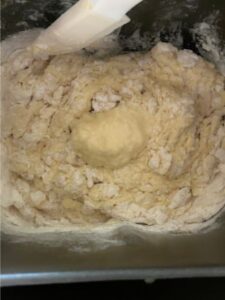
Then comes the all-purpose flour in a heap on top. I usually start with 3 1/4 cups and add more if needed as the machine starts to mix. Make a little well or indent in the top of the flour and add the yeast.
It should look like this:

STARTING BREAD MACHINE
Put the bread machine pan back in the bread machine and select the dough function on it. I usually watch the dough as it starts to mix together to make sure it combines well and has the right texture to it. This is where the spatula comes in handy in case it does not grab all the flour from the sides or bottom of the pan. If necessary, add more flour, little bits at a time, until the dough has a texture of starting to look smooth and just ever-so-slightly sticky. Let the machine work its magic (mine takes an hour and a half for the dough cycle).
Scraping sides with spatula as it mixes.
How texture of dough should look.
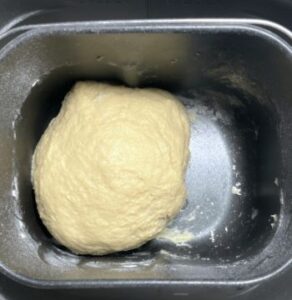
When the bread machine cycle is complete, I check on the dough to see if it has risen to almost fill the dough pan. If not, I just leave the lid shut to keep it warm with the machine off and wait about 15 – 30 minutes and check on it again. The amount of rise time is different every time based on the temperature of your home that day. My cue is just when the dough has pretty much filled up my bread machine pan (approximately doubled in size).

Once risen, I pull the bread machine pan back out and punch the dough down to deflate it.
SHAPING DINNER ROLLS
Prepare cookie sheet with parchment paper.
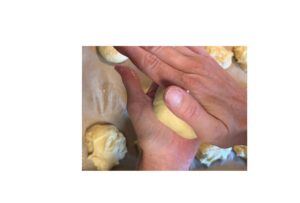
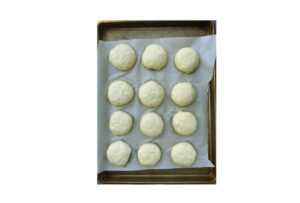
Section the dough into 12 equal pieces to fill the cookie sheet. To do that, I take a small, serrated knife to cut the dough and then lay them on the cookie sheet where they will end up baking. After all pieces are laid out, grab them one at a time, and fold the edges into the center to form a ball shape with a smooth top. Put folded edge side down onto bottom palm of hand and then roll each dough ball in a circular motion between the palms of your hands to form the shape of the rolls. After they are all shaped, let the rolls rise again until doubled in size
Folding outside edges into center to form a ball.

Rolling dough between the palms of hands in a circular motion.
Dinner rolls should look like this when shaped. Let them rise again on pan to double in size.
BAKING DINNER ROLLS
After rising for the second time, bake at 375 degrees for 10 – 15 minutes until golden brown. For my oven, I usually start watching at about the 10-minute mark and adjust the timer from there.
Brush freshly baked dinner roll tops with 1 tbsp melted butter using the pastry brush. Let them sit on the cookie sheet to cool down. Serve warm.
HOW DO YOU STORE BAKED BREAD MACHINE DINNER ROLLS?
When dinner rolls have cooled completely, they can be stored in a container of your choice or a gallon size baggie.
HOW LONG DO THESE DINNER ROLLS LAST?
Leftover rolls can last up to 3 – 4 days on the counter depending on the temperature of your home. I try to keep them out of any direct sunlight. There are no preservatives in them, so their shelf life is much less than store bought ones.
PIN FOR LATER!
BREAD MACHINE DINNER ROLLS
Ingredients
- 1/2 cup butter, melted
- 1 cup milk
- 2 eggs
- 1/4 cup sugar
- 1/2 tsp. salt
- 3 1/4 – 3 1/2 cups all-purpose flour
- 1 tbsp. active dry yeast
- 1 tbsp. butter, melted for brushing on top of baked rolls
Instructions
- Crack the 2 eggs and add them directly into the bread machine pan.Next, melt the butter on low heat in a saucepan (or microwave if you choose). Once it melts add the milk into the butter to cool it down before adding it into the bread machine pan with the eggs. The milk cools off the butter so it does not scramble the eggs!Add in the salt and sugar. Then dump the all-purpose flour in a heap on top. I usually start with 3 1/4 cups and add more if needed as the machine starts to mix. Make a little well or indent in the top of the flour and add the yeast.Put the bread machine pan back in the bread machine and select the dough function. Watch the dough as it starts to mix together to make sure it combines well and has the right texture to it (this is where the spatula comes in handy in case it does not grab all the flour from the sides or bottom of the pan). If necessary, add more flour, little bits at a time, until the dough has a texture of starting to look smooth and just ever-so-slightly sticky. Let the machine work its magic.Once the dough cycle is complete, check on the dough to see if it has risen to double in size. If not, I just leave the lid shut to keep it warm with the machine off and wait about 15 – 30 minutes and check on it again. The amount of rise time is different every time based on the temperature of your home that day.Prepare cookie sheet with parchment paper.Section the dough into 12 equal pieces to fill the cookie sheet. To do that, I take a small, serrated knife to cut the dough and then lay them on the cookie sheet where they will end up baking. After all pieces are laid out, grab them one at a time, and fold the edges into the center to form a ball shape with a smooth top. Put folded edge side down onto bottom palm of hand and then roll each dough ball in a circular motion between the palms of your hands to form the shape of the rolls. After they are all shaped, let the rolls rise again until doubled in size.Bake at 375 degrees for 10 – 15 minutes until golden brown. For my oven, I usually start watching at about the 10-minute mark and adjust the timer from there.Brush freshly baked dinner roll tops with 1 tbsp melted butter using the pastry brush, and then let them sit on the cookie sheet to cool down. Serve warm.After cooled completely, they can be stored in a container of your choice or a gallon size baggie.
Leave a Reply